
Last updated on November 14th, 2022 at 11:29 am
All of our reviews are based on exhaustive research, industry experience and whenever possible, hands-on testing. When you make a purchase using one of our chosen links we’ll get a small percentage of the proceeds. This supports the site and keeps Jeffsetter running. You can read more here.
Your RV probably feels like your home away from home, and if you are a full-time RVer, then it is your home. It is however important to understand where and how your RV is similar to and different from a typical residence. That way you can ensure you are maintaining it properly.
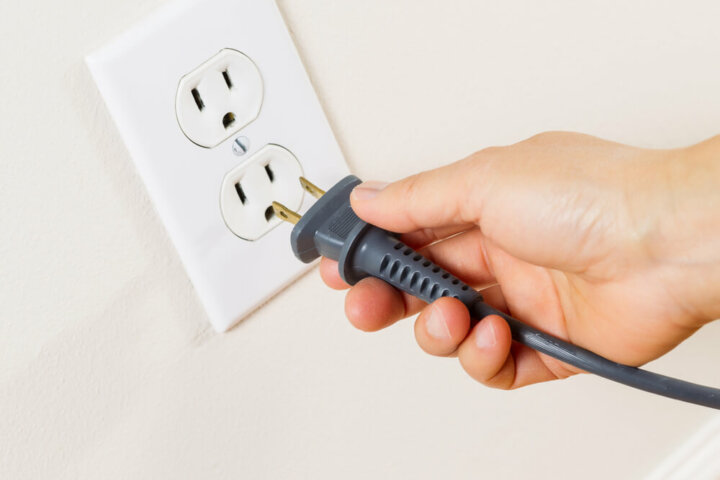
You’ve probably looked at your RV outlets and thought that they look just like the ones in your house, but are RV outlets the same as house outlets?
House and RV outlets function similarly and they run on 120-V AC power, but because RVs usually run on a 12-volt DC power battery a generator, inverter, or shore power is necessary in order to run power to the RV outlets. Additionally, RV outlets are shallower, they can wear more quickly and are less secure.
We’ll explore how RV outlets differ from residential ones, GFCI compliance and troubleshooting as well as how to replace your RV outlets with residential ones.
Are RV Outlets the Same as House Outlets?
RV outlets compared to house outlets are not so different, but they’re also not the same so let’s take a look at what might be setting the two apart!
Differences & Similarities to House Outlets
RV and house outlets are very similar in functionality, but they do have some essential differences that you should know about to make sure your RV outlets are functioning properly and running the correct amount of power.
The physical design of the outlets themselves differs from one another. An outlet for your home is designed to be screwed into a stud and wired throughout the walls, an RV outlet has to be designed differently because there are no studs in the walls of an RV. Usually, an RV outlet is attached with a plastic clamp to keep it secure inside of the wall.
In addition, RV outlets are shallower and may have different ways to connect the wires than a house outlet will. While a house outlet will have screws to hold everything in place, RV outlets will have spring clips or a slide-in wire holder to keep everything in place and make the proper connections. Because of this, RV outlets can wear more quickly and are less secure than residential outlets.
Both residential and RV outlets operate on a 120-volt AC (alternating current) system. The difference is that an RV itself runs on batteries that are a 12-volt DC (direct current) system so a generator, inverter, or shore power is going to be necessary in order to run power to the outlets.
You can expect to run the same kind of devices and appliances on RV outlets as you do inside your home.
How Do RV Outlets Get Power?
Because your RV battery puts out 12-volt DC power, if you want to run your RV outlets off of just the battery, you will need an inverter for that to work. An inverter will convert the power so that it can run the outlets.
Without an inverter, the battery can power your overhead lights and your USB charging points, but not the outlet itself.
Depending on the RV the 12-volt DC power system is powered by two or more batteries. One battery or set of batteries will start the engine of your RV and power the dashboard. The second set of batteries will power the water pump and the refrigerator. All of your other appliances and devices will likely be powered by 110-volt or 120-volt AC power, which is why you need the inverter.
Additionally, you can run your outlets off of shore power when you are connected at a campsite or off of a generator. We talk more about inverters here so feel free to check it out!
Can You Use GFCI Outlets in Your RV?
GFCI outlets are typically safer than a standard outlet and can protect you from being electrocuted by shutting power off when necessary. GCFI stands for ground fault circuit interrupter, you can and should use them in your RV whenever possible.
The way these outlets work is that they have a breaker inside that when tripped will automatically cut off power to the outlet. Typically, the breaker is tripped when the outlet or plug that’s plugged into the outlet comes in contact with water or any kind of moisture. These outlets are usually a requirement to have in your bathroom or kitchen because these areas are usually high in moisture.
There are GFCI outlets that are made specifically for your RV because the ones you might find in the home are typically going to be larger. Space is always a premium inside of an RV, even when it comes to outlets. That being said, you can use residential outlets inside of your RV and there are benefits to this as they tend to be safer and can last longer.
You are not necessarily required to use GFCI outlets in your RV but you should look into the requirements of your state just in case you are. The National Electrical Code details what is deemed necessary for safety in your RV. Make sure you are meeting those standards when you do any electrical work inside of your RV.
GFCI outlets will typically have a ‘reset’ button in the center that can be pressed when the circuit is tripped to turn the outlet back on.
In your RV, multiple outlets may be connected to the one with the ‘reset’ button and because of this, may not have a button themselves. They will usually have a sticker indicating that they are GFCI outlets. The button on the main outlet will control all of these outlets.
GFCI Outlets Keep Tripping
This is a common issue you may run into in your RV, GFCI outlets can be sensitive and might trip often. Most often, they trip because of contact with water. That being said, in an RV one GFCI outlet might be connected to multiple outlets, so if one trips they might all shut off.
Unplug everything from the GFCI outlet with the reset button and all nearby outlets if they are also not working. After this, look and see if you can find any signs of moisture on or in the outlet. Wipe them dry with a cloth on the outside and allow the interior time to dry.
If you don’t see any signs of water then you may have had something plugged in that tripped the power. If this is the case, then press the reset button while nothing is plugged in. If the button stays in, plug in the devices one by one until it trips again. Whatever device tripped the breaker may need to be replaced or could have moisture on the plug.
There’s also a possibility that the wiring itself is the problem or the outlet is bad. If that’s the case, then it can be replaced or rewired. A qualified technician is probably best for the job, but later in this article, I’ll go over the steps of how to replace an outlet in your RV. Just make sure to take safety precautions and if you aren’t sure you can do it, bring in a professional.
Can You Add More Outlets to Your RV?
You can add outlets to your RV if you find that it doesn’t have enough to power all of your devices and appliances, which can easily happen if you’re traveling with your whole family!
With anything involving electricity, you want to be confident in your ability to add an outlet safely. The risk of electric shock and fire is definitely real and something you should consider before starting a project like this. A really easy solution to a problem with lack of outlets is buying a couple of power strips and using those instead.
If you want to do it yourself, the video below shows you a step-by-step way to add a new outlet to your RV.
How To Replace Outlets in Your RV?
You may end up needing to replace an outlet over time if one stops working, or you might want to update an outlet so you have added USB ports or just a safer outlet to use. Follow the steps below to safely replace an RV outlet with a residential one.
You can modify these steps if you are simply replacing an RV outlet with another RV outlet. The added steps help with adapting a standard outlet to your RV. You might want to replace the RV outlet with a standard one because they can be more reliable and longer lasting as well as less expensive.
As stated before, make sure you are confident before starting this project that you can do it safely because it can be very dangerous to work with electricity.
Tools & Materials
- RV Outlet
- Faceplate
- Electrical box for the outlet
- Offset screwdriver (Philip’s head)
- Flathead screwdriver
- Voltage tester
- Wire strippers
- Needle-nose pliers
- Utility knife
Removing the Outlet
- The first step is to always make sure that you have turned off the power completely. You’ll want to use your voltage tester to make sure that there is no power going to the outlet before starting any of your work.
- Remove the face plate of your outlet with a screwdriver
- Remove the outlet from the wall — please note that it will still be attached to the wall via wires.
- Release the box with a screwdriver or tool on the side ports by pushing in on the tabs
- Pull the back cover off
- Pry the wires from their pinch points.
- If you have trouble with this, then snip the wires with wire cutters
- Place the old outlet aside
Installing the New Outlet
- Fold the wires back into the wall to keep them safely out of the way
- Hold the box to the wall and draw around the outside of it
- You will likely need to accommodate a larger box by cutting into the wall, this can be done with a utility knife or whatever tool you prefer to use.
- Once you’ve sized the hole correctly and the box fits snuggly, pull the wires back out of the wall and feed it through the box
- Secure the new box to the wall using screws
- Remove the wires from their casing using your utility knife
- Strip the wires using your wire stripper
- Pick up the new outlet and get ready to re-attach your wires
- If there are no labels that tell you what wire goes where, black wires go to brass screws, white to silver, and green or copper will go to the green screw
- If there is a grounding wire, it will also attach to the green screw
- Use your needle-nose pliers to curve the end of each wire and place them under their respective screw
- Tighten the screw so that it secures the wire in place
Finishing Touches
- Use electrical tape to cover the screws
- Put your outlet into the box and secure it
- Place the faceplate back onto the outlet and secure it
- Turn the power back on and test the outlet
This is a basic guide on how to replace an outlet in your RV with a residential outlet. I recommend using it in conjunction with a video like the one linked previously in this article for it to be most effective.
Call in a professional electrician if you aren’t sure you can do this by yourself. For them, adding a new or replacing an old outlet will likely be a quick and easy job to complete.
Conclusion
RV outlets are very similar to residential outlets but do have some differences in their size and how they function off of an inverter, shore power, or a generator. You can replace your RV outlets with residential ones if you would like added features and safety, but before making that replacement ensure there is no power running to the outlet you are working on.
RV outlets might need to be GFCI compliant and you should check the regulations of your state before making any changes to your outlets. If you run into some trouble with your GFCI outlets, it can be easy to troubleshoot what the problem is.
And, when in doubt, call an electrician!