
All of our reviews are based on exhaustive research, industry experience and whenever possible, hands-on testing. When you make a purchase using one of our chosen links we’ll get a small percentage of the proceeds. This supports the site and keeps Jeffsetter running. You can read more here.
Like with any vehicle, regular oil changes are part of vehicle upkeep and maintenance. When you run old, worn-down oil through your RV engine, it gets sluggish and doesn’t lubricate as well. This can cause weird noises that happen as pieces of machinery rub together and over time, it damages your engine.
As a general rule of thumb, you’ll need an oil change at least once a year, more often if you’re actually using your RV. You also will usually need a change somewhere between 3,000 and 6,000 miles.
So, where can you get an RV oil change?
Depending on the size of your RV and the size of their workspace you can get an RV oil change at any garage that offers the service. Having a mobile mechanic come to you or going to an RV dealership are other alternatives, or you could do the oil change yourself!
Below, I’ll go a little deeper into detail about where to get an RV oil change. I’ll also give you some info on how often you’ll need to change the oil in your RV and go over the process to do one, in case you decide you have the time and are up for it!
Why Are RV Oil Changes Necessary?
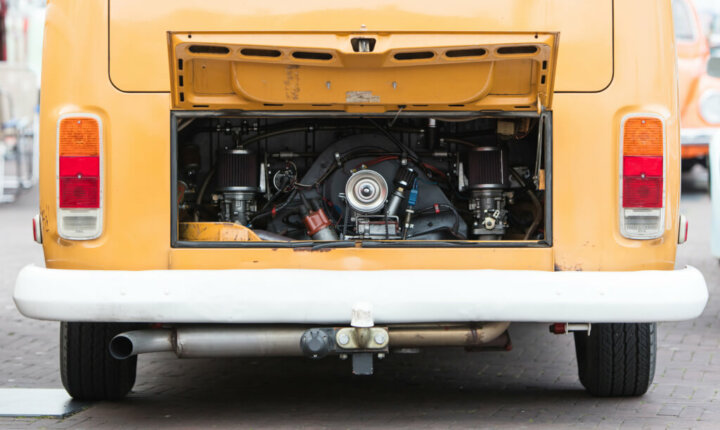
The oil in your RV’s engine is critical for prolonging the life of your engine and keeping all the parts running as they should. Oil works as a lubricant because of its slippery texture, but it’s also designed to withstand the high temperatures of an engine.
Oil runs through your whole engine as the car operates, keeping it cool and stopping the parts from rubbing together. Like most things though, the consistency of the oil breaks down with time and it can get dirty from running through your engine.
Where to Get an RV Oil Change?
As an RVer, the first thing you need to consider is the size of your RV. Someone with a smaller RV under 20 feet needs less space for an oil change than someone with an RV for a family of five. Something else to consider is the type of RV you have, as their ability to do an oil change might be different depending on if you are driving a diesel RV vs. a gas RV.
If you’re going to have someone else change your oil in their own maintenance shop, you want somebody that knows what they are doing and who has the space to do it.
Mobile mechanics are another great option because they come to you and work on your vehicle. This means you don’t have to drive to them, plus there isn’t the obstacle of not having enough room in the garage to pull the RV on, so RV length isn’t a factor.
One thing to note though is that not all RV parks let you do oil changes or maintenance on the property, so be sure to look into that before scheduling an appointment. This could also affect whether or not you can do your own RV oil change, too.
There are also car mechanics that work on RVs as well. The processes are pretty similar, so a lot of times what it comes down to is whether they have the space to accommodate your RV for the oil change.
RV dealerships are another alternative, especially since they usually have the space to do RV oil changes. That being said, not all RV dealerships work on their vehicles so it really depends on the specific business.
Finally, doing your RV oil change yourself is also an option. I’ll go over the process a little later and I’m pretty sure you’ll find that it’s pretty easy with the right tools!
Do Regular Car Garages Do RV Oil Changes?
Some regular mechanics do oil changes. Since the process to do an oil change on an RV is pretty simple, in most cases, it depends on the size of the shop and if they can get your RV into their workspace.
That being said, it’s not enough to get a car garage and any mechanic who is willing to work on your RV, you’ll also want to be sure they are familiar with working on RVs. While an oil change is pretty standard and easy to do, you still don’t want someone working on your RV that you can’t trust to do a good job.
How Often Do I Need an RV Oil Change?
Like with your vehicle, the frequency of oil changes varies by the model and how often you are driving your RV. However, the standard is anywhere from 3,000 to 5,000 miles or around 8 months to a year after your last oil change. People who use their RV a lot might need as many as 3-4 oil changes per year.
You should always use whichever of these recommendations comes first. For example, if you only get your RV out once or twice a year and don’t put a lot of miles on it, you’ll still need to change your oil about every eight months. It can get gunked up just from sitting in the engine.
On the other side of things, if you use your RV a lot and manage to hit that 3,000 to 5,000-mile mark before a year, you should change your oil because it’s been run through the engine so many times. Of course, this might change slightly based on the manufacturer of your RV, so it’s always best to follow their guidelines.
Furthermore, the frequency could change based on the type of oil that you use. Conventional oil generally needs to be changed sooner, whereas synthetic oil is more likely to last at least 5,000 miles and sometimes as much as 15,000 miles or more.
RV engines that are older or that have a higher mileage on them already also may require you to change your oil more frequently. People who travel in hilly areas going up inclines also need more frequent oil changes.
The amount of weight your RV carries also matters. If you use kayak racks to carry outdoor gear or you’re towing a car behind you, it’s more work on the engine and you may need more frequent oil changes.
How Do I Know if My RV Needs an Oil Change?
There is a light that indicates when the engine needs to be serviced on your dash, though this is less of an indicator because it’s set on a timer. It’s better to check your oil regularly and watch for these other signs that your engine oil is dirty.
You should check your RV oil level at least once a week when you’re actively using it. Be sure to wipe the oil off the stick and reinsert it for the most accurate reading.
Clean oil is going to be golden brown and has a translucent color, while old oil might appear thicker, dark brown, or even black. It also gets more opaque as oil gets thicker.
If your oil level gets lower, there could be a leak or it could mean that the oil is starting to get thicker, which is a good indicator you need an oil change.
The smell of burning oil or smoke coming from the exhaust also indicates a possible oil problem. This usually happens when there’s a leak somewhere.
Finally, listen to sounds in your engine. Any grinding, squealing, or knocking indicates a problem and sometimes it is the oil.
Do I Need to Change My RV Oil if I’m Not Using It?
Yes, you should still regularly schedule oil changes even if you aren’t using your RV. Oxidation is a natural process that happens over time regardless of how much you are using your RV.
As the oil reacts with air, it makes the oil thicker and less effective, even when not being used, and condensation can also affect the oil.
Why You Should Consider Doing Your RV Oil Change Yourself?
Regardless of whether you plan on doing your own oil change or not, I personally believe that it’s best to have a few mechanical skills when you set on the road, especially if you’re planning on going off-grid.
Doing your own RV oil change is a great place to start because it gets you under the hood and can make you feel a little more comfortable.
The reason I say this is that even when you do all the proper checks and inspections before you go out on your trip, there’s always a chance that something will go wrong.
When you know how to do some of the basic fixes, it can go a long way if you’re far from town or a mechanic that is familiar with working on RVs.
How to Do an Oil Change in an RV?
One of the first things that you’re going to do is look in the manual for your RV to find out information about oil changes.
You’ll need to know the specific type of filter that you need, how much oil you should have in the engine, and what type of oil. If you don’t have the manual, you can probably find this information online.
What Tools/Equipment Do I Need for an RV Oil Change?
You’ll need a few different tools for your oil change. A lot of these things are reusable, so you’ll find the only thing you really need every time you do your RV oil change is the oil and oil filter for your RV. Remember to get a little more oil than you actually need, just in case of spills.
You’ll also need an oil drain pan to catch the old oil, an oil funnel to pour oil into the engine without a mess, and an oil funnel wrench, which is designed especially for helping you remove the old oil filter.
You’ll also need a ratchet for pulling the plug to drain the oil. The size will vary depending on your RV, but 5/8 or 16mm sizes are standard.
Finally, you’ll need a few things for cleanup. Shop towels work well and are pretty absorbent, but towels or rags work, too. You’ll need these for your hands and also for wiping up any spilled oil as you’re working.
How to Do an RV Oil Change in 7 Easy Steps?
Before you start, you’ll want to park your RV somewhere that’s level since this is important for getting all the old oil drained out of the engine. You should also be sure that the transmission is in park and the emergency brake is on, just to be on the safe side.
Then, write down the mileage and date you did the oil change, so you know when it’s time to do it again. You can write it right on the filter!
I’ve gone into the steps with a few extra tips below, but for people who are more visual learners, here’s a quick video of an RV oil change that could be helpful.
I highly recommend checking out YouTube after you have an understanding of the basic process. A lot of times, you’ll be able to find helpful mechanic videos specific to your type of RV.
Step 1: Drain the Oil
Start with draining the oil first. Put the oil drain pan in place and cover the ground with an oil spill tarp or other protection if you’d like.
Use the wrench and socket to start loosening the bolt found underneath the oil pan. I usually prefer to use my hand for the last part of unscrewing the bolt, just so I don’t drop the bolt and lose it.
Then, let the oil drain out into the pan under your RV. You can move on to the next step if you’re waiting because this will probably take several minutes.
Step 2: Swap Out the Oil Filters
Start by opening the box with the new oil filter and filling it with oil. You should also coat the O-ring on the filter.
Next, you’ll use the oil filter wrench to remove the filter. Be careful while doing this because there’s usually leftover oil in the filter, so it can be messy to remove.
Then, you’ll install the new oil filter. You can screw this in using your hand because you want it tight, but not so tight that it’s impossible to remove when it’s time for your next oil change.
It’s helpful to rub a little of the clean oil on the gasket before installing the new filter. This stops the filter from seizing and ensures it won’t be too hard to remove next time.
Step 3: Replace the Drain Plug
Once all the oil has drained out of the filter, screw the drain plug back into the pan. Be sure that it’s tight enough so it isn’t going to leak, but not so tight that it will be hard to remove next time.
Step 4: Fill with the Recommended Amount of Oil and Replace the Cap
Use the funnel to add oil back into the reservoir. You should add as much as the manufacturer of your RV recommends because it can vary between RVs.
Once the oil reserve is filled to the recommended level, screw the cap back on tightly. Having an airtight seal is important for keeping the oil running through the RV engine and not splashing or spilling out when it’s running.
Step 5: Check Your Work
Before you clean up, start the RV and let it run for a few minutes while you look for leaks. As long as it’s not leaking, pull the dipstick, wipe it off, and then check your oil levels to be sure they are within range. If it all looks good, then you’re just about done!
Step 6: Clean Up
Then, you’ll want to clean up your hands and any spilled oil. Wipe clean any oil in the engine, since this will smoke if it gets hot when the engine’s running. If you do get oil on concrete or a similar surface, you can absorb some of the leftover stain using cat litter.
Final Word
For people wondering where to get an RV oil change, there are a lot of options including your local mechanic, mobile mechanics, and RV dealerships.
No matter where you decide to go to don’t be afraid to ask about their experience and make sure they have enough space to accommodate the length of your RV.
Of course, doing it yourself is also an option. It really isn’t that hard and as a bonus, it’s a great way to get familiar with your RV!